To make facilitators and students work together (Could even be an informal data collection activity)
To get the community interested in what the students are working on/doing
To get them to realise that rainwater is a good alternative and that they should drink that instead
Activity: The students could be split into 2 groups, or more- depending on the number of facilitators available. They get one fluoride testing kit each. They can walk around the village and neighbouring villages and test various water samples with the kits they are provided.(The previous exercise would have helped them identify various sources where they get water from). They could draw from this and test water from the taps in their homes, the kere’s, the well water that they all drink and even the water in the tank in the school. They can compare the fluoride levels in each of these water sources and see how much higher than the permissible levels it is.
To leave a mark and make it slightly more interesting (drawing from guerrilla art), each time they test a source, they can leave a smiley or a sad face sticker near the source, depending on weather the fluoride level is above or below the permissible level. This might be a small way to get the larger community attracted to this as well. If someone sees this, they might react to it and ask around what this is about. This might lead to in-direct awareness through the children and also create dialogue.
These are the water smiley stickers that I am going to ask them to stick on the different water sources, depending on weather they have permissible amounts of fluoride or not.
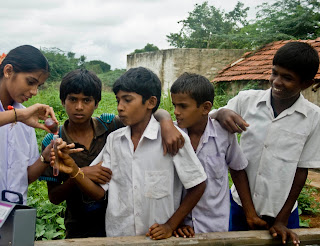
I first started a conversation on permissible fluoride levels (to see if they remembered- some of them did and some didn't!) and ask them what the positive and negative effects of fluoride are, and what they can do about it. I then quickly showed them how the kit worked.We tested the water that one of the students got from home, with had 2mg/l fluoride. So, they stuck a sad face on the bottle. (The symbol of thumbs up and down was new to them! So I had to keep pointing up and down with my thumb initially to say good and bad! Soon, the picked it up though and at end of each test pointed their thumb up or down accordingly!) Then I told them about the exercise and we set out to the neighbouring village.
We first tested the main water tank in that village which had 1.5mg/l, which is not too bad. So we stuck up a happy smiley. The whole village crowded around to see what we were doing and the kids explained to the community what they were testing and that their water had 1.5mg/l, which was good.
Lokesh sticking up the happy water smiley
Then, while walking around, we found a house which had a rain water harvesting tank! They decided they wanted to test the water the family used to drink before, in the open tank, as well as the rain water that is pumped out from this pump, which they use for drinking now.
The rainwater had no fluoride in it
This is the open tank the family used to drink from earlier. This had 2mg/l
The maximum amount of fluoride we spotted was 3mg/l in a water sample from a household. We told them about the importance of drinking rain water.
After we tested many household samples, two tanks and two rainwater samples, we went back and on the way, discuss the different levels we found.
Inference: Through this activity, the students were able to see for themselves how much the fluoride levels are in the water bodies they see every day. Since they are the ones testing it, it might have had a bigger impact on them (more than when it just spoken about in class). It also added a layer of fun to it as they imagined it to be a mini treasure hunt where they were little scientists and tested the water themselves and leave marks for other people to talk about. It also made it a novel idea around the village and was discussed by people who spotted these water smilies, thus spreading awareness. They asked the kids what they were doing and what it was for. It is also an activity that involves the teachers and the larger community, thus bridging the gap.
More images of this activity can be viewed in this slide show


No comments:
Post a Comment